2010 Jeep Compass Sway Bar Link Torque Specs
The sway bar link is a suspension component that connects the sway bar to the suspension and chassis. When sway bar links go bad or the bushings tear they can cause everything from rattles and clunks when going over bumps to excessive leaning of the vehicle during turns.
There are some vehicles that have sway bar links in both the front and rear suspension. There is one sway bar link that connects each side, so if your vehicle has two sway bars, you will have four sway bar links total. While the is some variance in sway bar link design, the steps for replacement are very similar. An important thing to remember is that if no other suspension components are removed, replacing the sway bar links will not require you to realign the vehicle.
Method 1 of 1: Replace the sway bar links
Materials Needed
- Jack
- Jack Stands
- Lug Wrench
- Penetrating Lubricant
- Pry Bar
- Ratchet
- Safety Glasses
- Socket Set
- Replacement Sway Bar Links
-
Wheel Chock
-
Note: Refer to your car's owner's manual or a service manual to find out the size of sway bar links you need to replace the old, worn out ones.
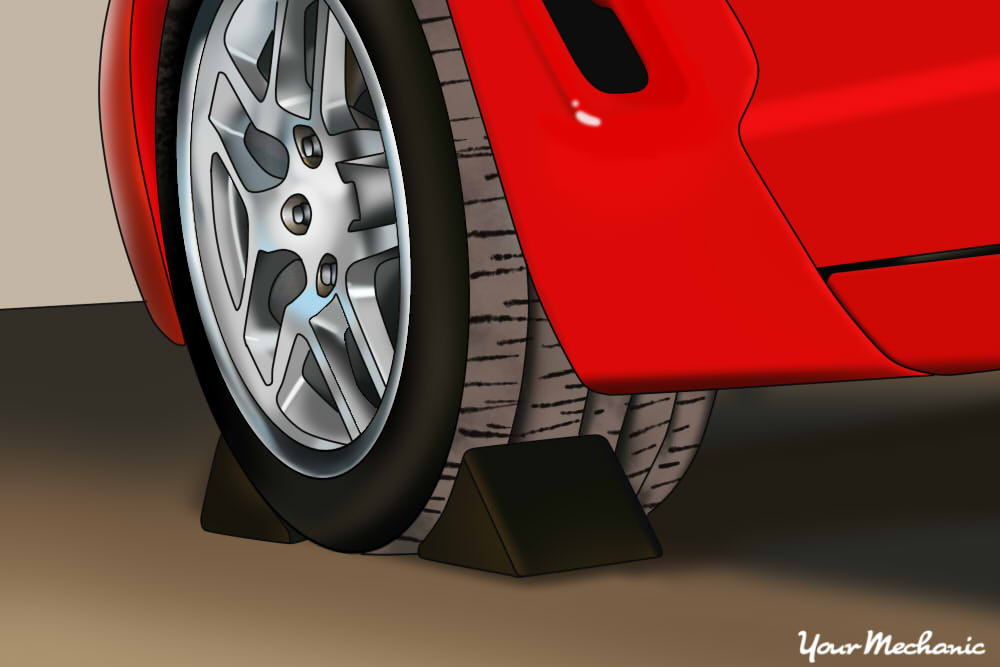
Step 1: Engage the parking brake. Set the parking brake on the vehicle and set the wheel chocks on one of the tires you are not removing.
This is for safety and will insure the vehicle will not roll.

Step 2: Loosen the lug nuts. Using the lug wrench, loosen the lugs on the tires that need to be removed slightly, but do not remove them.
Step 3: Raise your vehicle. Find the lift point on your vehicle and raise it using the jack.
Lift points are the locations designated by the manufacturer where it is safe to raise your vehicle from. Lift points are different for every vehicle and can be found in your vehicles owners manual.

Step 4. Secure the vehicle. Once the vehicle is raised, place a jack stand in a secure position on the suspension arm where the sway bar link is attached and lower the vehicle onto it.
This is important because the sway bar is a load bearing part. Setting the jack stand in this way compresses the suspension and relieves the pressure from the sway bar link.
Leave the jack slightly touching the lift point while still keeping the majority of the vehicle's weight on the jack stand.
Step 5: Remove the tire. At this point, remove the lug nuts completely and then remove the tire from the vehicle.
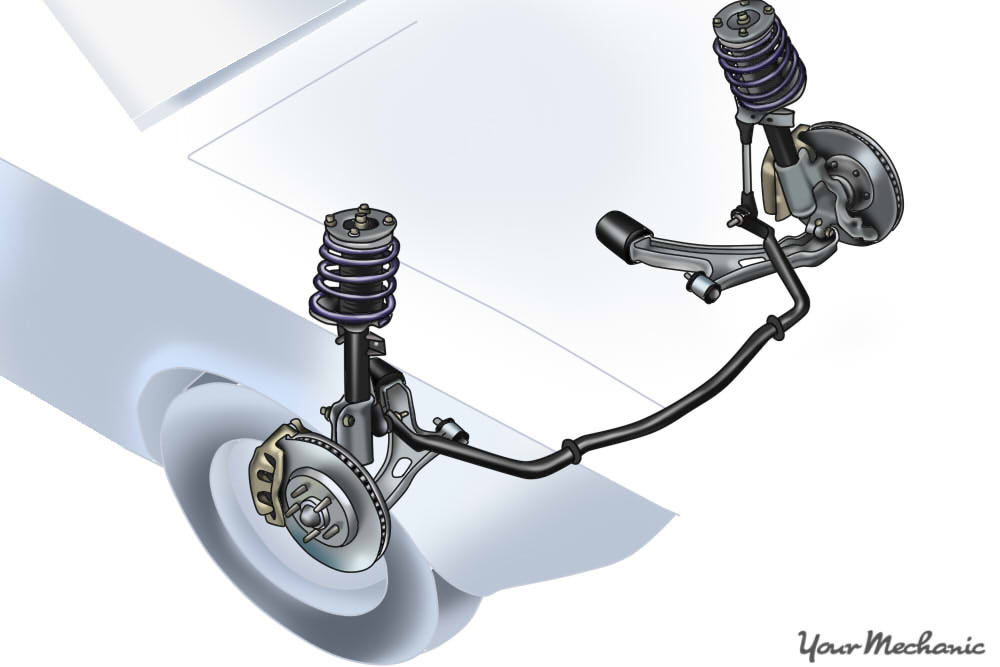
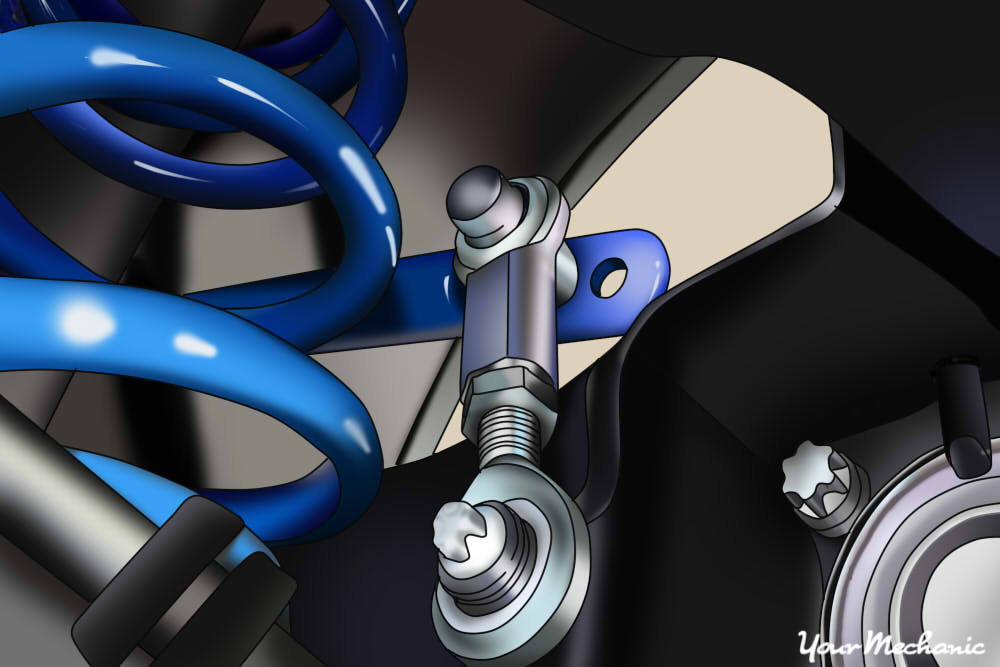
Step 6: Locate the sway bar link to be replaced. Sway bars are usually located at the front of the car and are bolted to the suspension on your vehicle.
Depending on the make and model of your car, you may have only front sway bars links, or front and rear sway bar links.
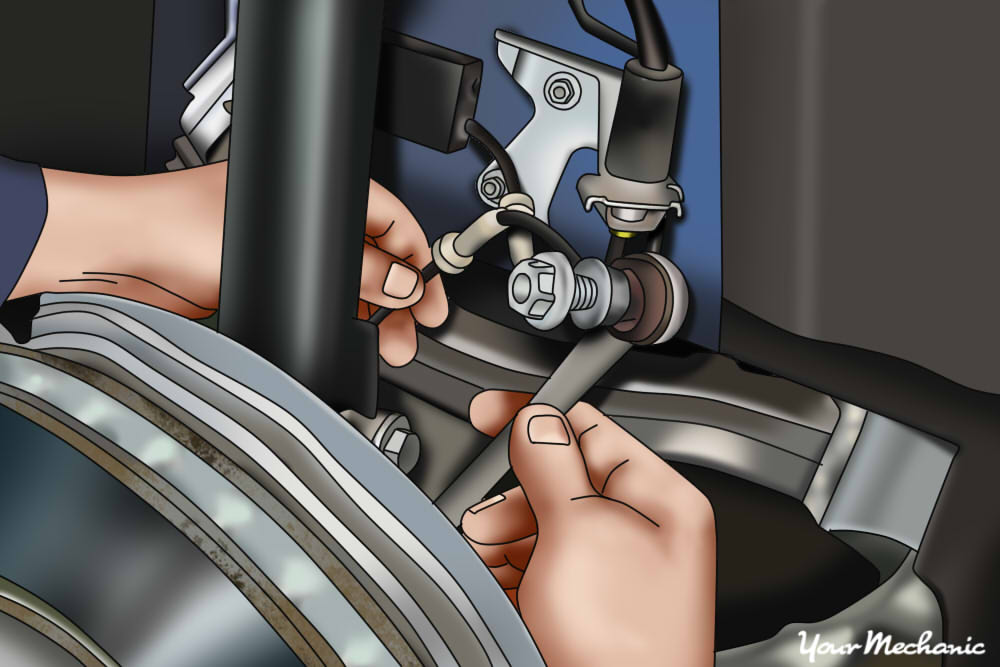
Step 7: Remove the lug nuts. Two lug nuts hold the sway bar link in place. Start by removing the upper nut first. This nut holds the most weight when the sway bar is at normal rest, so it tends to be the most problematic.
Once the top nut is removed, remove the lower nut.
- Tip: For rusted or frozen nuts, spray them with penetrating lubricant and allow a few minutes for the lubricant to take effect. This will make the job a bit easier.
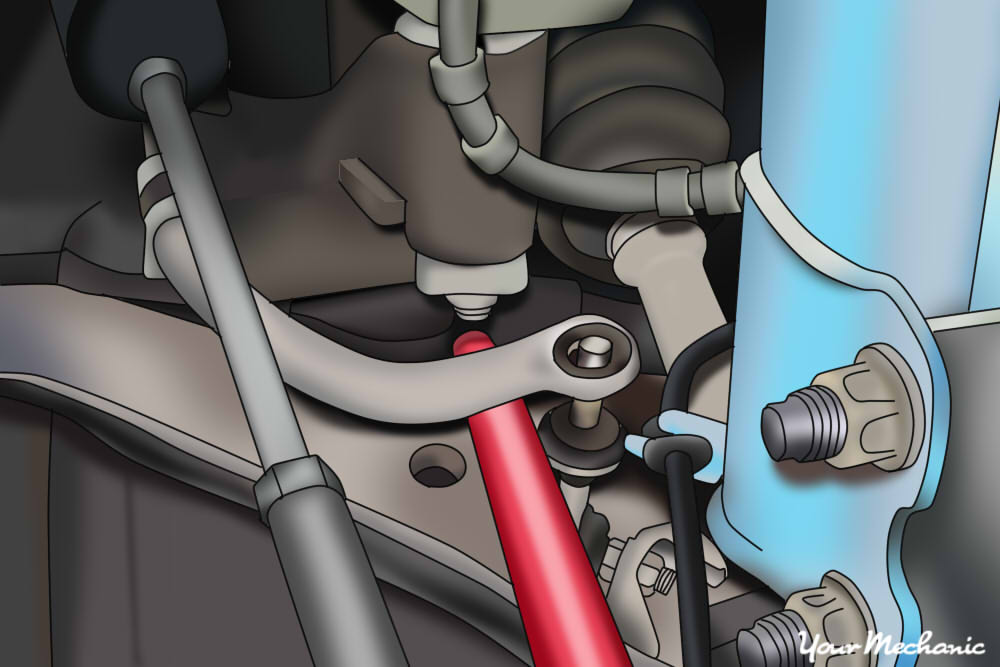
Step 8: Apply pressure on the sway bar. Once both nuts are removed, take your pry bar and apply pressure on the sway bar close to the link.
This will relieve any remaining pressure on the sway bar link and allow you to remove it.
Step 9: Make sure the new sway bar link matches the old one. Use the pry bar to apply pressure down on the sway bar and install the new link in place of the old one.
Make sure the direction of installation is correct as the ends can look very similar.
Once the link is in place, install the nuts and tighten them to the appropriate torque specification. Refer to the owner's manual of your vehicle to find the correct torque specification for your car.
Step 10: Install the tire back on the vehicle. Tighten the lug nuts as much as possible, but don't over do it. Putting excessive pressure on the car can knock it off the jack stand.
Once the lug nuts are snug, remove the jack stands and lower the vehicle slowly using the jack.
Step 11: Tighten the lug nuts. Once the vehicle is back on the ground, tighten the lug nuts to the appropriate torque specification.
If you are changing more than one sway bar link, simply repeat the steps on the other side.
Replacing the sway bar links is a repair process that can be done with a few basic tools. If you don't have access to the correct tools or are short on time, ask a certified mechanic from YourMechanic to replace the sway bar links for you.
The statements expressed above are only for informational purposes and should be independently verified. Please see our terms of service for more details
2010 Jeep Compass Sway Bar Link Torque Specs
Source: https://www.yourmechanic.com/article/how-to-change-a-sway-bar-link-by-isai-rodriguez